

Remember how forever ago I said I would post a tutorial on how to fold these cute boxes. Sigh, life is busy. But I am here to fulfill my promise, even if it is a bit belated. We had a Super Saturday at church with classes we could take. My awesome friend, Becky, taught us how to create these, so I give her all the credit.
 |
| What you need, paper, scissors, ruler pencil and some type of adhesive. |
 |
| 1.On the blank side of your paper draw an X from each corner, using a ruler. |
 |
| 2. Fold the bottom corner to the center. |
 |
| 3. Fold the bottom corner one more time up to the center. |
 |
| 4. Now you are going to do the exact two folds from steps 2 and 3 to the opposing top corner, so your paper will look like this. |
 |
| 5. Unfold your paper and make the same folds to left and right corners that haven't been folded yet. So once again, fold the point to the middle. |
 |
| 6. Do a second fold to the center and then do the exact same folds from steps 2 and 3 to the opposing corner. |
 |
| 7. Your paper is once again going to look like this. Make sure you make a firm crease with each fold. |
 |
| 8. Now Unfold your paper again. All the folds you have made so far has created a lined graph on your paper. Take your scissors and cut along the first crease right of the pencil line. Cut two squares down. Don't cut further than that! |
 |
| 9. Cut 2 squares down along the crease just left of the pencil line. Once again, don't cut further than the 2nd square. |
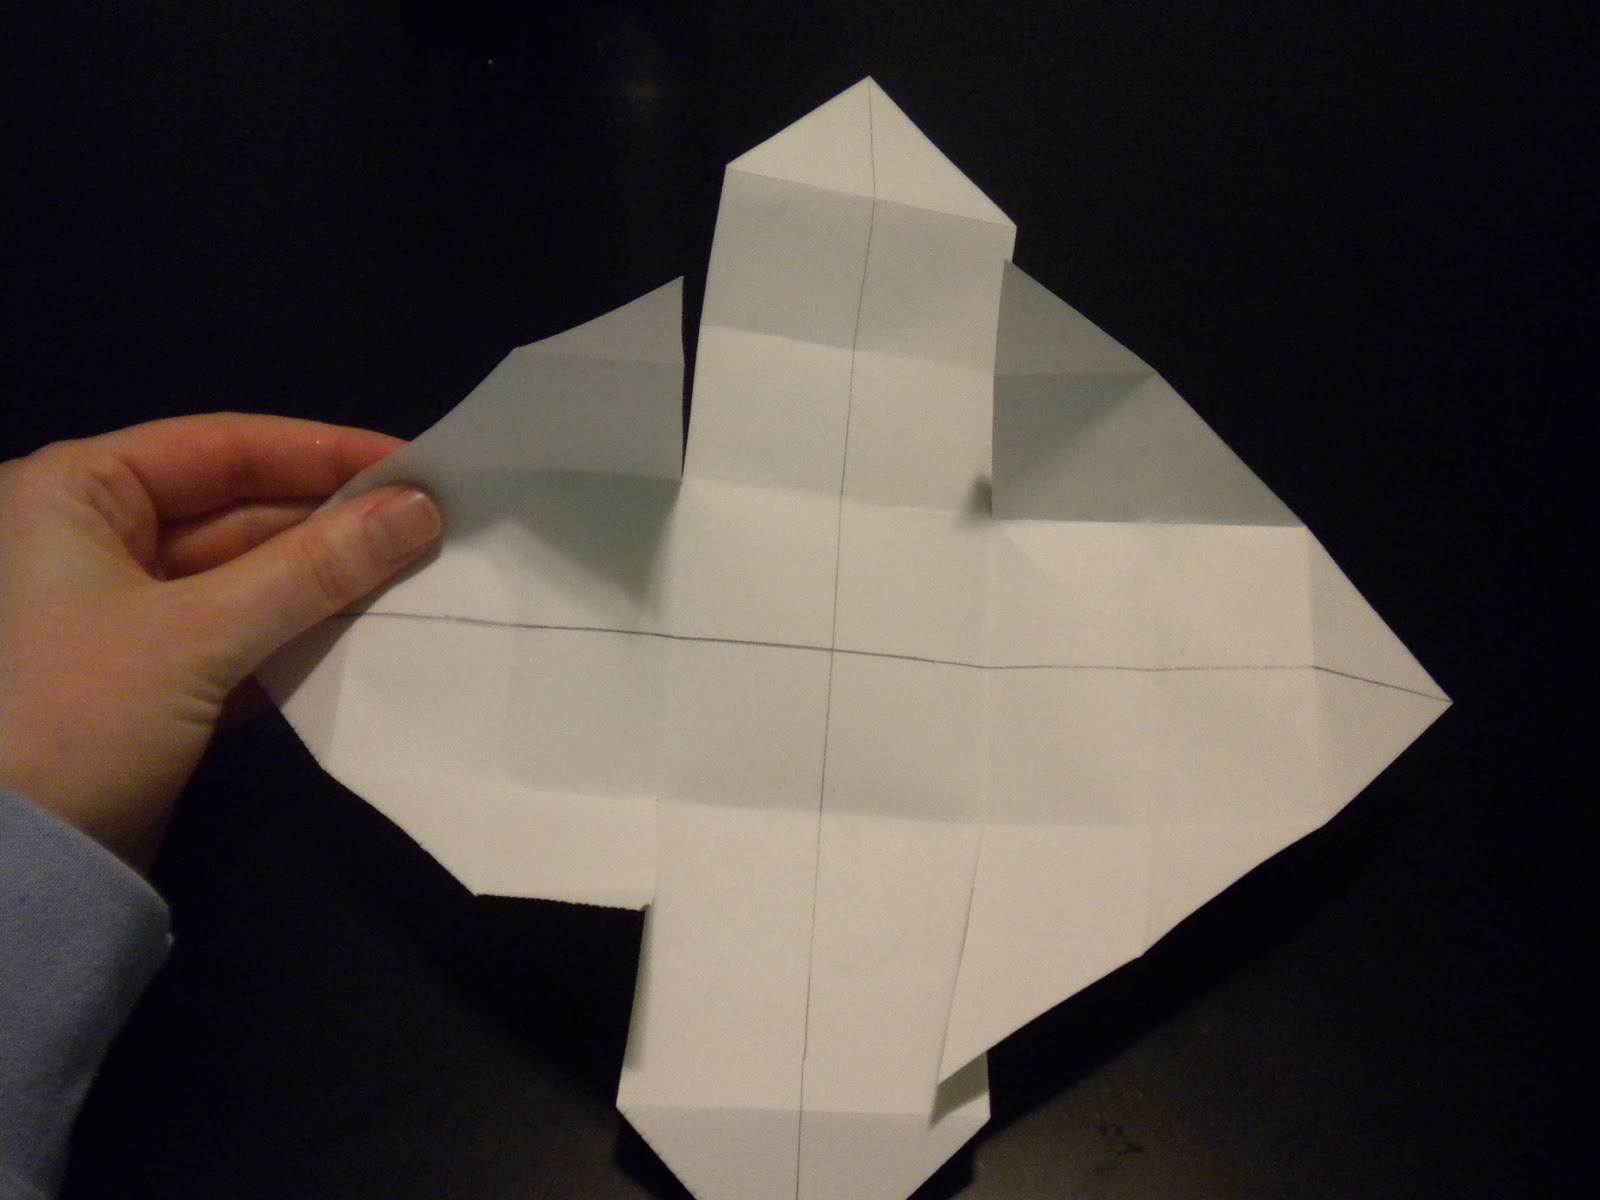 |
| 10. You are going to make the exact same cuts to the opposing corner from steps 7 and 8. Leave the other two corners uncut. Your paper should look like this when you are done cutting. |
 |
| 11. On one of the uncut corners, you will once again take the corner and fold it up to the center of the paper. |
 |
| 12. Take the right flap and fold it inward. |
 |
| 13. Now fold the left flap inward so it is on top of your right flap. |
 |
| 14. Fold the rectangle you've now created into the center. |
 |
| 15. Follow the steps 11-14 for the opposing top corner. Once both corners are folded, your paper should look like this. |
 |
| 16. Now pop up both sides from the center. |
 |
| 17. Take your flaps from both the top and bottom and unfold them so they are at a 90 degree angle. |
 |
| 18. Take one of the side corners that is just hanging out and fold it over the wall you created with the flaps to the center. Use your adhesive on the underside of the point to make it stay. |
 |
| 19. Follow step 18 for the last corner and look what you have... |

For the three boxes to sit on top of each other, I used paper that was a 1.5'' difference from each other. I used the glue dots to get them to stay and then just tied a little ribbon around the whole thing.
Very nice tutorial! I love how you took so many pictures to explain exactly what you were doing in each step! - Becky Shuler
ReplyDeleteYour boxes are very nice. Does Danny remember making these with his family? I learned how to make little boxes out of old Christmas cards in Relief Society years ago.
ReplyDelete